


Table of contents
- What is Moodle ?
- Step 1: Update Operating System
- Step 2: Install Apache webserver
- Step 3: Install PHP and PHP extensions for Moodle
- Step 4: Install MariaDB
- Step 5: Create Database in MariaDb (mysql)
- Step 6: Download Moodle(4.0.1)
- Step 7: Configure Apache Web Server for Moodle
- Step 8: Configure the moodle.
- Step 9: Moodle Web Installer
What is Moodle ?
Moodle is widely used in educational institutions, ranging from schools to universities, as well as in corporate training environments, to deliver and manage online courses and enhance the learning experience.
Step 1: Update Operating System
Update the package lists: Run the following command in the terminal to update the package lists, which contain information about the available updates you might be prompted to enter your password. Type your password (you won't see it as you type) and press Enter.
Upgrade installed packages: After updating the package lists, you can upgrade the installed packages to their latest versions. Run the following command:
$ sudo apt update
$ sudo apt upgrade
Step 2: Install Apache webserver
Apache2 is the default web server software in Ubuntu, providing a reliable platform for hosting websites and serving web content. Choose the Y or y when it prompts for permission to downloding.
$ sudo apt install apache2
You can start the Apache service and configure it to run on startup by entering the following commands:
$ sudo systemctl start apache2
$ sudo systemctl enable apache2
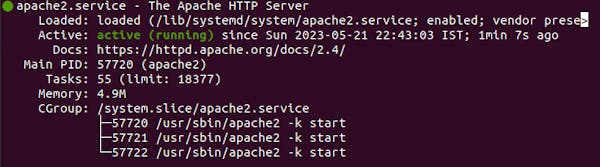
Check whether apache2 is running or not by the status of the Apache service using systemctl status command:
$ sudo systemctl status apache2
Output :
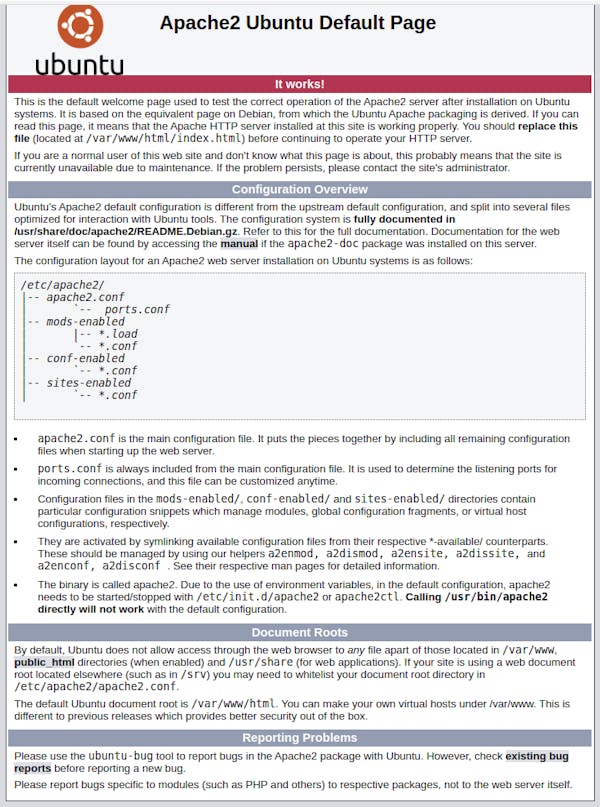
Check to make sure everything is working correctly by navigating to:
http://your-IP-address or http://localhost
Step 3: Install PHP and PHP extensions for Moodle
PHP is a popular server-side scripting language in Ubuntu, used for developing dynamic web applications and enhancing the functionality of websites. By default, Ubuntu 20.04 comes with PHP version 7.4. Choose the Y or y when it prompts for permission to downloding.
Install PHP and required PHP extensions using the following command:
$ sudo apt install php libapache2-mod-php php-iconv php-intl php-soap php-zip php-curl php-mbstring php-mysql php-gd php-xml php-pspell php-json php-xmlrpc
Check if PHP installed or not with $php -v
Output:

Step 4: Install MariaDB
MariaDB is a robust and scalable open-source relational database management system (RDBMS) in Ubuntu, serving as a powerful backend solution for storing and managing data in various applications. Choose the Y or y when it prompts for permission to downloding.
You can install MariaDB with the following command:
$ sudo apt install mariadb-server mariadb-client
The commands below can be used to stop, start and enable MariaDB service to start automatically at the next booting of os:
$ sudo systemctl stop mariadb
$ sudo systemctl start mariadb
$ sudo systemctl enable mariadb
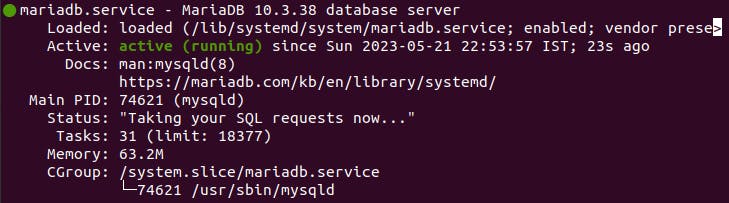
Check whether apache2 is running or not by the status of the MariaDB service using systemctl status command:
$ sudo ststemctl status mariadb
Output:
Then open the MariaDB default configuration file:
$ sudo gedit /etc/mysql/mariadb.conf.d/50-server.cnf
Under ‘[mysqld]‘ line, paste the following configuration:
default_storage_engine = innodb
innodb_file_per_table = 1
innodb_file_format = Barracuda

Save and exit, then restart MariaDB service:
$ sudo systemctl restart mariadb
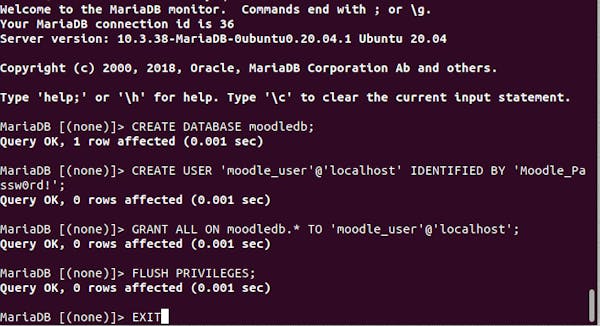
Step 5: Create Database in MariaDb (mysql)
Login in to mariadb shell using :
$ sudo mysql -u root
To create a database, database user, and grant all privileges to the database user run the following commands:
MariaDB [(none)]> CREATE DATABASE moodledb;
MariaDB [(none)]> CREATE USER'moodle_user'@'localhost' IDENTIFIED BY 'Moodle_Passw0rd!';
MariaDB [(none)]> GRANT ALL ON moodledb.* TO'moodle_user'@'localhost';
MariaDB [(none)]> FLUSH PRIVILEGES;
MariaDB [(none)]> EXIT
Step 6: Download Moodle(4.0.1)
Download the latest stable Moodle version from the Moodle Official site, choose the Y or y when it prompts for permission to downloding.
Use the command below for downloding moodle-4.0.1.zip file:
$ sudo wget https://download.moodle.org/download.php/direct/stable400/moodle-4.0.1.zip
Unzip to extract all the downloded file in to /var/www/html/ directory.
$ sudo unzip moodle-4.0.1.zip -d /var/www/html/
Now create the moodledata directory in /var/www/html/ directory:
$ sudo mkdir /var/www/html/moodledata
Enable permission for the Apache webserver user to access the files:
$ sudo chown -R www-data:www-data /var/www/html/moodle/
$ sudo chmod -R 755 /var/www/html/moodle/
$ sudo chown -R www-data:www-data /var/www/html/moodledata/
Step 7: Configure Apache Web Server for Moodle
Navigate to the /etc/apache2/site-availables dirctory and create moodle.conf file as:
$ sudo gedit /etc/apache2/sites-available/moodle.conf
OR edit the already existed 000-default.conf file ther as given below :Enable the virtual host:
$ sudo a2ensite moodle.conf
or
$ sudo a2ensite 000-default.conf
Then do restart the Apache web server.
$ sudo systemctl restart apache2
Step 8: Configure the moodle.
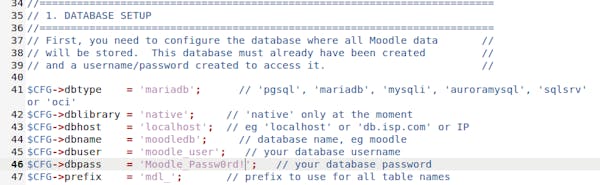
Navigate to /var/www/html/moodle directory and copy the config-dist.php file to config.php then edit the Database Setup information accordingly to the database created in step 5 by open the config.php file:
$ sudo cp -r config-dist.php config.php
// Now open and edit
$ sudo gedit config.php
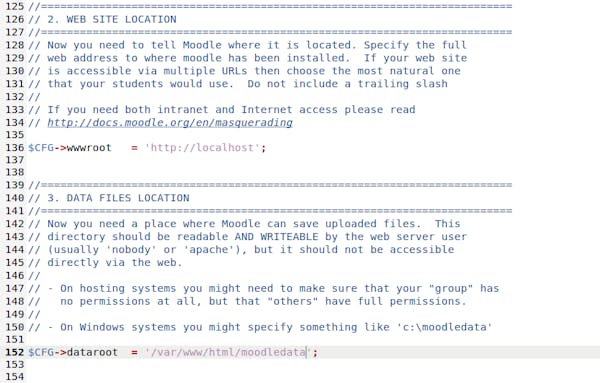
Now edit the Web Site Location and Data Files Location in config.php file:
Step 9: Moodle Web Installer
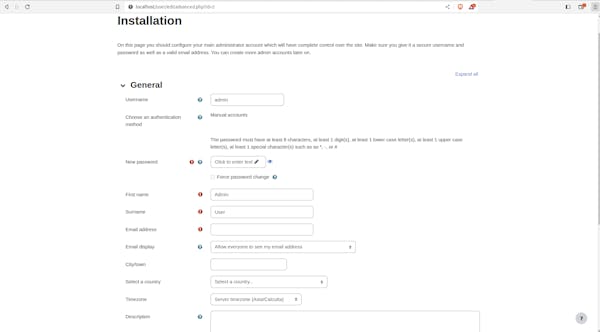
Open your browser type your domain e.g http://your-domain.com or http://localhost You will see the Moodle installation page.
Accept the Copyright Agreement. Just click ‘Continue‘.

Make sure all results are ‘Success‘. Then click ‘Continue‘ again.

Fill the required detailes click "Next" to continue.Fill in your admin info and click ‘Update profile‘.
System Checking, checks the server configuration and all PHP extensions needed by Moodle.
Then click ‘Next‘ to continue.

If all the requirements are OK click ‘Continue’

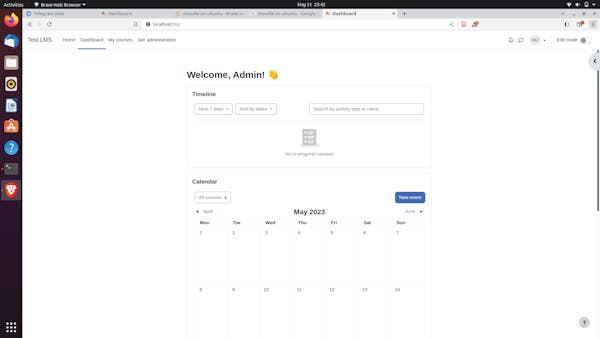
You will be redirected to the user admin ‘Dashboard‘:
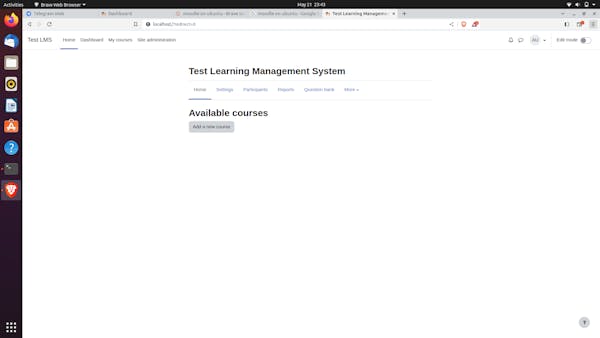
Successfully Downloded and Setup the Moodle-4.0.1 .